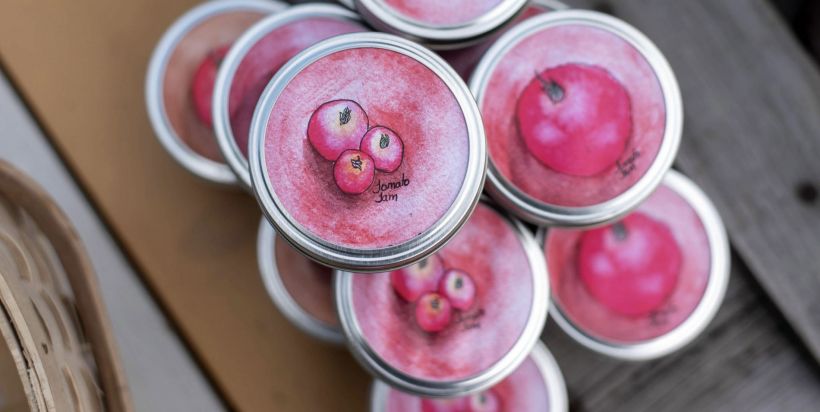
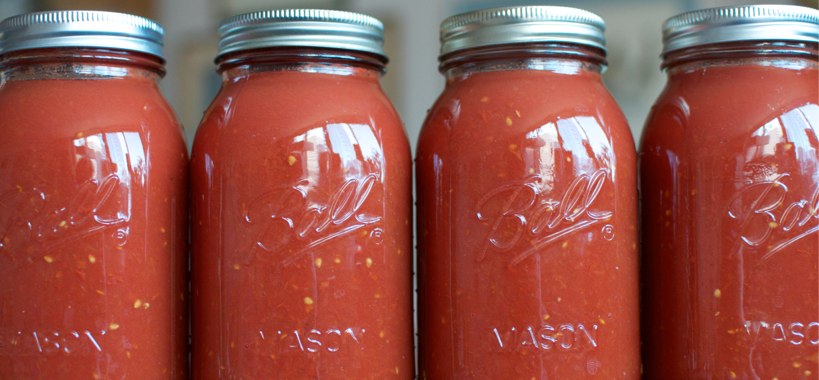
Canning 101: Sweet Cherries for Winter Days
Written by Cheryl of Backseat Gourmet
My Baba was the canning and preserving queen. It wasn’t a fun, retro thing for her. It was about survival. And survival meant more than enough food to make it through the winter. It also meant a little bit of sunshine on a cold, harsh winter’s day on the Prairies. For her, that sunshine came in the form of canned fruit.
Her root cellar was filled with more than enough food for two people and any visitors. On one special shelf were jars of jams, obviously, but also j ars of canned berries and cherries that grew in her garden. With a significant sweet tooth Baba’s fruit was more like an excellent pancake syrup.
I’ve adapted her canned fruit concept and lightened things up. I’ve also added more fruits to my repertoire, and taken some out. Canned strawberries are actually quite mushy, so I prefer alternative methods of preserving their goodness long term. Now I take advantage of the stone fruit that comes out of British Columbia, our neighbouring province.
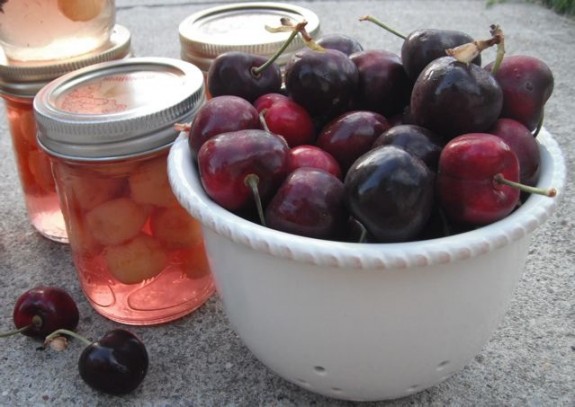
Sure, you can make loads of jam with all those peaches, apricots, cherries, and plums. But a girl can only eat so much toast. Of late, I’ve really been enjoying the whole fruit in a light syrup. Cracked open in January, spooned on ice cream or oatmeal, or eaten straight, they are indeed a taste of summer sunshine.

(all photos by Cheryl)
This method does not cook the cherries before canning. I prefer the firmness of the canned cherries so I skip the pre-cooking. If you would like a softer cherry, cook the cherries with the water and sugar for 5 minutes before proceeding with canning steps.
This recipe is also focuses on sweet, rather than sour cherries. Sour cherries are great for pie filling, but not eating straight up.
Canned Cherries
(Please refer to our post on canning/preserving basics to get the low down on sterilization and cleanliness in the preserving process.)
- 2 pounds sweet cherries (Rainier, Bing, or other sweet variety)
- 4 cups water
- 1 1/2 cup – 2 cups sugar
- vanilla beans, almond extract (optional)
1. Wash and pit your cherries. You can use a cherry pitter or simply cut the cherries in half to remove the pit. Do this over a large bowl to capture any juices.
2. Combine the water and sugar in a large saucepan. Stir and bring to a boil to dissolve the sugar. Keep hot (but not boiling) while you prep your jars.
3. Ensure your jars are clean, sterilized, and hot. (Adding hot syrup to a cold jar may cause the jar to shatter!) With clean hands, stuff as many cherries as you can into each jar. How many you get in each jar will depend on the size of the jar and cherry. I managed to get about 16-20 Rainier cherries in each 250 mL jar. Fill to 2 cm below the rim.

4. If you want to add vanilla to your cherries, cut some 1 inch pieces of whole vanilla bean. Add to the desired jars. Alternatively, you could add a drop or two of almond extract to the cherries.
5. Fill each jar with the hot syrup, stopping 1 cm from the rim of the jar. With a clean, hot, wet cloth, wipe the rims of the jars and place the sealers and lids on top. Tighten with your hands.
6. Process in a boiling water bath for 15 minutes.
7. Remove from the water bath, let cool, and listen for the pops. To let the full flavours develop let the jars rest a few weeks before digging in. Of course, refrigerate any jars that do not seal and enjoy immediately.
What is your favourite way to preserve the sunshine?

That sounds so delicious. Thanks Cheryl
Sounds wonderful! I haven’t heard people talk about preserving sweet cherries… only sour.
My favorite way to preserve summer is strawberry freezer jam. So simple, but so delicious!! Only problem… it rarely makes it to winter because we eat it! 🙂
I’ve tried some sour cherries this year for the first time. Cherry Pie in November here I come!
I am so there! I have never been brave enough to do this. But, cherries are on sale this week. And that sounds like a great winter dessert. Thank you!
I love to top cake and oatmeal with them, but they are delicious all on their own as well.
Help! I just did 2 batches of this recipe last night. All of my bottles have mini clusters of air bubbles this morning at the top of the bottles on the cherries. Seals are ok. I have not had this happen before? I used the ball squat pint wide mouth jars; processed 15 min.in hot water bath.
Should I reprocess them?
I have never thought about doing that! What a great idea! I wish I still lived in Idaho, where cherries would be falling off of trees staining neighborhood sidewalks. Now, I’ll just have to wait for cherries to go on sale here in TX!
Cherries grow in abundance not too far from where I live and I’ve never thought to do this. Fantastic idea…I’ll give it go!
Funny, one of my earliest foodie memories was being served a bowl of home preserved cherries at a dinner party with my parent’s friends. I can still recall the pretty china bowl, the tablecloth and the company. Of course the cherries were the most memorable part.
Now I am so inspired to can my own. You’ve shown us that it is indeed simple.
What about leaving the pits in? Is that tacky? Unprofessional?
You could leave the pits in, but personally, I hate having bits of inedibles on my plate at the end of dinner. Would you want your guests doing the same?
u can leave them in but theres a high chance of someone biting down accidently or a child cracking down on a tooth or maby choking on it. They r small enough to swallow but who knows…
My Mom and Grandma always canned cherries and left the pits in. No big deal. They were delicious.
Pitting goes pretty fast if you have a cherry pitter. The one I use is the Westmark Kernex, but there are several listed on Amazon. This is a single use tool that I use each year when cherry season rolls around. Well worth it since mine has lasted for at least 10 years so far.
Great recipe for canned cherries! I made some last year but added a bit of brandy to each jar for a more grown up treat. Those things made GREAT cocktail garnishes. 🙂
Bookmarked!
Wow, what a great recipe.
I have tried other fruit and made jams, jellies and preserves but I haven’t tried cherries before. My husband would love this, I guess I will have to give this one a try next.
I am with Xan…heading to bookmark this one now!
Thanks for sharing this yummy treat Cheryl.
Blessings,
Christine
This sounds awesome! How many jars does it make?
Canned cherries are my very favorite homemade winter dessert. I leave the pits in so that they develop that wonderful almond-y flavor. Yeah, it makes for a less pretty eating process, but my lord, the FLAVOR. It’s astonishing in January.
You are so right. The flavor is not the same without the pits.
This sounds amazing. Canning is something that I’ve always wanted to learn but have always put off until “next year.” For this, I’m going to really do it this year.
Thank you so much for sharing!
Believe it or not, my family has always canned cherries with pits in. There was something about sucking on those pits until they were completely that pleased me immensely as a kid (I know, choking hazard, whatever!). Just thinking about eating them makes my mouth water, even in the height of cherry season!
My grandmother (long gone now) was a fantastic dinner-party throwing maven long before Not a one complained about the cherry pits discretely dropped back onto their spoon and left behind in their bowl as forensic evidence of summer long gone.
I made these cherries because I had an abundance of cherries this year, they are very tasty. I used 1 liter jars instead and adapted the processing time accordingly and followed everything else according to the recipe. When I took them out after processing some of the liquid boiled out through the lid onto the side of the jars and then once they cooled, they all sealed. The cherries at the top 3/4 inch are not covered by the syrup since some of the liquid was lost. I was wondering if the cherries will still keep and why the liquid would have boiled out?
Thanks for sharing your process- I’ve got 18lbs of Ranier Cherries coming home tomorrow and I’ve never tried canning cherries before and was getting a little panicked! Thanks!
Thanks I am going to try this for the 1st year my sour cherries have an abundant crop again this year so I am looking for new ways to preserve them. Last year went to wine and this year the crop is being prepped for no bake cherry cheese cake YUM.
Hello there !
I have just finished canning my rainier cherries ( I only added the almond extract ) and boy does it smell and look soo tempting !
I cannot wait to dip into one of these little gems :o)
My only problem or thing i would comment on is that if you are working with the rainier cherries , make sure you have a cherry pitter or quickly toss with lemon juice to stop from browning . I’m sure it won’t affect the flavor but it would be nicer if they hadn’t browned the little bit that they did .
Thanks so much for this wonderful recipe !
take care , and happy canning all !
~Danielle~
When I dry or can sliced apples, I soak them in water in which I have dissolved a couple of large vitamin C tablets, about 1000mg for per quart. I soak the apples for at least ten minutes I was told not to soak them for more than an hour, but usually i move them out after 10 to 15 minutes, so i can get more chopped and ready. It adds to the processing work, but they do not color much at all. Maybe that could work for your cherries.
I was concerned about the browning of rainier cherries too, but the brown disappeared after being processed in the canner.
I just want to tell everyone that I made a batch of these cherries. I purchased a large batch here in Kansas City from Price Chopper and yielded 7 1/2 Pints. They all sealed and look WONDERFUL! IMPORTANT: the remainder of the cherry juice can be reduced somewhat and used. I pour it in ice cube trays, freeze it, then put in a freezer bag. I do this with my home-made stocks too! I also do it with Pineapple juice. To make a Sweet & Sour sauce for Chinese food: mix 1 cup Pineapple Juice, 1/2 cup Cherry Juice, 1/4 cup Apple Cider Vinegar, 1/4 cup Sugar, and 2 Tbsp Cornstarch w/ 1/4 cup water (make a slurry). Heat all on low heat to a low boil–stirring constantly. Turn off heat and cool. This is POOL PARTY TESTED with Crab Rangoon! It was a hit!!!
Oh my – would you share your recipe for the crab Rangoon too!
So I’m just curious, but the National Center for Home Food Preservation lists the processing time for raw pack cherries as 25 minutes for both pints and quarts. Are you processing for 15 minutes because you’re canning in half pint jars?
I’m so glad I found this. I got a bunch on Rainier cherries and am canning a few pints for my mother-in-law. I just finished pitting the cherries and am ready to start packing the jars. Thanks so much. I know she’ll enjoy them at Christmas when we give them to her.
I tried this today 🙂
I’ve never canned on my own, and I think I did it wrong. No matter how close I got the syrup to the top or how careful I was to remove air bubbles; a large bubble remained after I took out the jars from the hot water.
Am I doing something wrong?
How long are the cherries good for? I canned some last summer and I haven’t eaten them all yet. I just opened a jar, and they tasted fine…?
Wow, I am excited to find your recipe. I have taken a quilting class from you and enjoyed it greatly. Now I am so excited to try your recipe for this. I am sure it will be amazing. I just came home from Kelowna with 30 lbs of fresh cherries. I am going to freeze some too. I had thought of that.
Years ago they used to tell you to can pints of raw pack cherries for 15 minutes. Now it’s 25 minutes for both pints and quarts.
I just wanted to say thank you. I used this recipe last year, it was my 1st time canning cherries. I did some with the vanilla bean and some without. The ones with the vanilla bean are amazing. I made it with 1 1/2 cups sugar and it was perfect. I think 2 cups sugar would be a bit much, and I haven’t tried it with the almond extract. I just canned 20 more quarts for this winter.
Grandpa made these last year with our cherries – even added the vanilla bean and they were a hit! When Thanksgiving came I used them in the Better Than Sex Fruit Salad instead of the cherry pie filling it calls for. I think the cherries were the best part! The cherries were sweet and you could just eat them from the jar. So nice to have these in the cold weather. I’m here today to use this same recipe again because it’s so easy grandpa (who is part blind) was successful.
Hello! I love your post! I made this recipe a in June of 2019, a couple months ago, and I checked the jars and there is a small bit of cloudy white stuff at the bottom of the jars. Do you think this is safe, or does this typically happen for you too? Thank you!