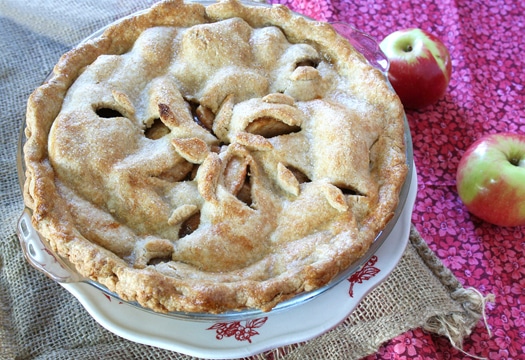
Let’s Bake an Apple Pie
Written by Diana of Spain in Iowa.
The temperatures are dropping and school has officially started. This is my first time as a parent with a child at school and I have to admit, the first couple of weeks I was heartbroken. I missed my little guy during the days and what made it worse, he was having a rough time being away as well.
Now that he’s adjusted and quite happy to be in kindergarten, I’ve been on the upswing. I have found myself with more time on my hands and, in this season, there is nothing more relaxing than baking an apple pie.

All photos by Diana Bauman
With my 3 year old at home, we’ve been able to turn up the music, dance and bake. There’s so much freedom and peace in listening to good music and playing in the kitchen.
What’s even more rewarding is that the older boys are happy to see what you’ve created after a long day of school and work. I’m starting to enjoy these school days and the season in which I have found myself.
So, with fresh local apples at every farmers’ market (or your neighbor’s tree) let’s have some fun. Let’s bake an apple pie!
First Things First, Let’s Make Our Own Pie Crust
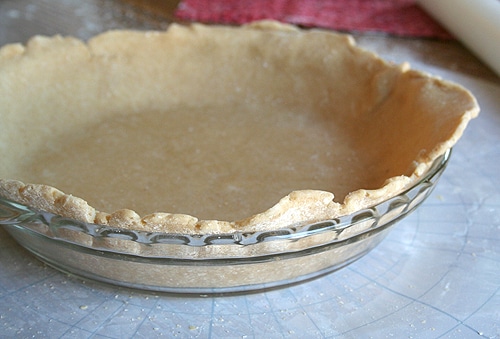
With only a few simple ingredients and a food processor, making a pie crust can be simple and quick to make.
This is my go-to recipe for a buttery, rich, flaky crust. A traditional French Pâte Brisée.
For a perfect crust every time:
- Keep all ingredients cold
- Do not over process the dough
- Use ice-water
- Allow your finished dough to rest in the refrigerator for at least 1 hour
For my pie crust, I grind my own whole wheat grain using soft white wheat berries. This is what you would find at the store called Whole Wheat Pastry Flour. In my opinion, store bought whole wheat flour does not compare to milling your own grain at home. It’s much heavier and in my opinion, gritty. If you do not grind your own grain, I would suggest using an unbleached all purpose white flour.
**For a video tutorial for this pie crust, head over to A Little Bit of Spain in Iowa and join me in my kitchen as I mix it up!**
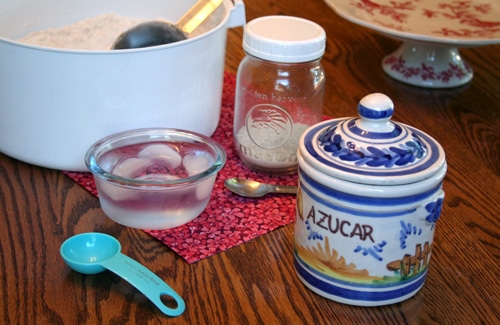
Ingredients for a two crust pie:
- 2 1/2 cups flour
- 1 tsp salt
- 1 tsp sugar
- 2 sticks unsalted butter
- 6-10 tablespoons cold water (This is quite a gap in measurements, however, since I use freshly milled grains, it’s much lighter and I only need around 6tbls of water. If you’re using store bought flour, you will most likely need anywhere from 8-10tablespoons)
Method:
1. In a food processor combine the flour, salt and sugar. Blend to incorporate.
2. Cut the butter in small pieces, making sure to not handle it too much. Your hands will give off quite a bit of heat and it’s important to keep your butter as cold as possible.
3. Add the butter to the flour mixture and pulse 6-8 times or until the mixture resembles a coarse grain. Do not over process.
4. Add 1 tablespoon at a time of water and pulse. Continue to do this until the dough just begins to hold together without being wet or sticky. Again, do not over process.
5. The dough should not stick together in a ball-shaped form. It should just begin to hold. Once you’re at this stage, empty the dough “pieces” onto the counter and shape quickly into a rounded ball. Divide into two balls.
6. Quickly shape each piece into a disc and wrap in plastic. Do not overwork.
7. Place the dough in the refrigerator for at least 1 hour before using.
The dough will keep in the refrigerator for 2 weeks or frozen for up to a month.
Let’s Bake a Naturally Sweetened Apple Pie

Now that our pie crust has been made, putting together a filling for apple pie is a breeze. What’s great about this version is that it uses real maple syrup as the sweetener. Its sweet maple flavor lends itself beautifully to the apples and cinnamon; no one would ever guess that a granulated sugar wasn’t used.
Ingredients:
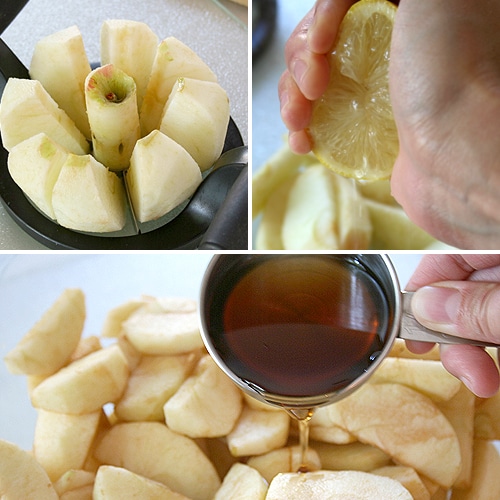
- 7 large local apples, (Some prefer tart, others don’t. It’s up to you which variety to use), peeled and sliced thinly
- 1/2 lemon
- 2 tbsps melted butter
- 1/2 cup real maple syrup
- 1 tsp cinnamon
- 1 tsp nutmeg
- 3 tbsps flour
Method:
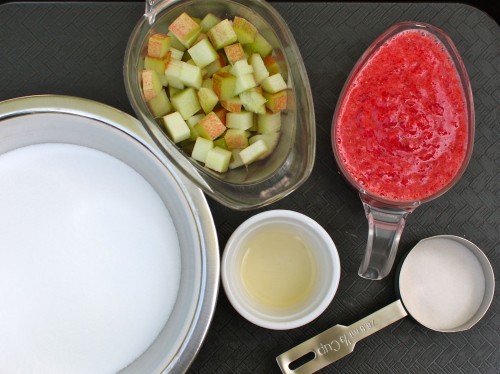
1. While peeling and slicing your apples, place in a large bowl and add the juice of 1/2 a lemon. Make sure to toss the apples in the lemon juice as you keep adding them to the bowl to prevent from discoloring. Once all the apples have been peeled and sliced, add the butter and maple syrup to the bowl. Mix well.
2. In a smaller bowl, combine the cinnamon, nutmeg and flour. Add to the apples and toss to incorporate.

3. Roll out one pie crust and line into a pie dish. Add the apple mixture into the pie crust, making sure to drizzle any remaining liquid on top.

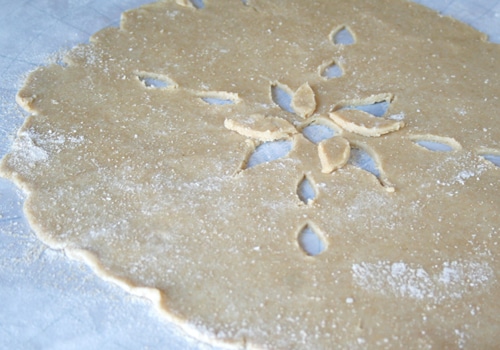
4. Roll out the top pie crust, cutting out any decorations into the crust.
5. Carefully, lift the top pie crust and cover the pie. Pinch the sides of the pie closed and sprinkle with organic sugar.
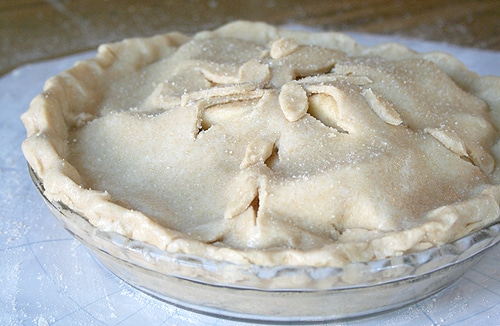
6. Bake at 450°F for 10 minutes. Lower the heat to 350°F and continue to bake for an additional 40-45 minutes.
Allow to rest for at least 1 hour before you cut through. The liquids will thicken as it cools.
What’s your favorite dish to make or treat to bake while jamming to your favorite tunes in the kitchen?


I am so going to make this. I don’t think I’ve truly baked a pie in my life. I wouldn’t know the first thing about making a crust. But, your amazing photos, and easy to follow steps make me feel like I have a tutor with me every step of the way. I would say I feel like I have my grandma in the room with me, but I don’t want you to take it the wrong way. 🙂 Thanks for your beautiful tutorial, and (I’m sure) mouthwatering recipe!
Awesome Sharon. As far as a grandma, no, I take that as a compliment ;D By the way, I just filmed a short video on making this pie crust over at my blog today. You’ll be able to visually see how easy it is ;D
http://www.spain-in-iowa.com/2011/09/pate-brisee-a-simple-pie-crust-recipe-with-video/
This is a beautiful tutorial. I love that you use whole wheat flour. Please tell me more about how you grind your wheat berries. I found some whole wheat crusts in the local health store freezers I usually use for pies, because I hadn’t thought I could make a crust to equal with whole wheat. But it sounds like grinding the flour fresh makes all the difference? I have a blendtec blender which purport to be able to grind flours–have you heard of them working well, or do you use a grain mill? Just wondering!
Thanks!
Hi Sarah, sure thing. I do have a Nutri Mill grain mill, however, your blendtec will work just fine. You can find wheat berries at a local health store or even Wal-Mart! I find that when I use fresh milled flour I only need to use 2 1/5 tablespoons of water for one pie crust or for the double pie crust recipe above, 5 tablespoons. Once you grind your own, you’ll never go back 😉
That is one beautiful pie! I love that you used maple syrup instead of sugar. I might use maple sugar. It’s a little lighter on the maple taste, but just as sweet.
I’ll have to try this with maple sugar. Sounds fantastic!
looks wonderful! Love all of your tips!
I have never made an apple pie. With Fall right around the corner, you just inspired me to make my first one. I cannot wait!
Fun! We just made apple pies and my post today is sharing my grandmother’s classic no-fail crust recipe along with my other grandmother’s pie filling. We also have a recipe that uses natural sweeteners – Apple Honey Pie – that we love.
Thanks for your tips on working with a pie crust and for sharing your recipe — I wish I had a slice right now 🙂
I might just bake a pie soon!! Thanks for inspiring me.
No problem!
What a gorgeous pie! I can almost smell it baking 🙂 I bet the maple syrup is outstanding. And I love that you bake with your kids! My 2-year-old loves to help me measure dry ingredients and crack eggs.
My boys love to crack eggs as well! Isn’t it soo much fun watching them learn? Love it!
Love this tutorial. Happy Baking!
Not sure which I like more: your photos, writing, or the pie itself!
Did you see the NYT piece on pie shell making a couple of weeks ago? Compared it to a zen mental exercise.
Cheers!
Thank you Steve. No, I’ll have to look into that piece but I can definitely relate.
We mill our own flour at home too and this is the first recipe I’ve seen tailored for that type of flour. Thank you so much for sharing!
Sounds lovely! I love the maple syrup to sweeten the pie. Yum.
Very inspiring! I’ll probably have to add some berries when I make one (hopefully soon!).
You can’t go wrong with berries!
So pretty! 🙂
I won my husband’s heart wiith an apple pie 15 years ago!
Time to bake him another one
I am sooo inspired to make my 1st apple pie!! Thank you for taking the time to do a BEAUTIFUL tutorial that makes an insecure baker like me, feel like even I can pull it off 🙂
I used to be a processed foods junkie, we have now cut out 95% of it, and I need to learn to actually “cook” some healthy “junk” food, lol! This apple pie looks like a great place to start!
Bernice
Great post! Beautiful pie – it is truly one of the best things about fall. Love the maple-apple combo!
This really does look exceptionally yummy! It’s the perfect time of the year to fill the house with the smell of a freshly baked apple pie.
Bookmarked!
I’ll be trying this one within the next week.
Oh, my. I’ve always been intimidated by homemade apple pie. You make it look do-able (and oh-so-delicious!).
I love the pie, looks great !
I recently featured Simple Bites on my blog along with some memories about my grandma and the delicious pies she made. She made and sold pies for a living. Thanks for a great recipe site. Can’t wait to try the apple pie.
Just made this recipe and loved using maple syrup instead of processed sugar. However, I think the cinnamon to nutmeg ratio is a little off-kilter which made the nutmeg flavor too powerful. Will definitely use this recipe again, but decrease the nutmeg and add a bit more cinnamon.
-Thanks for a beautiful step-by-step recipe, your pie is gorgeous!
Thanks for sharing the Maple syrup Apple Pie. Several years ago I was making apple crisp for our church. I went to get the lemon juice out of the ‘fridge and there was NONE. Not to panic, I saw a lemon soda in the fridge. I used the lemon soda in the water for the apples to keep them from turning brown. It was awesome. People were raving about it. I think it gave it just a little zing. The only think different was the lemon soda. Since then I have used 7 up. I want to try Squirt also, but have not yet.
Thanks for your blog. I love it. I have a single mother friend, that I am encouraging to go unprocessed as it is usually cheaper and TASTE so much better and so much better for our bodies. THANKS!
This pie looks outstanding! It gives me inspiration to bake one 🙂 Love your posts… Keep up the great job!!!
I made this pie using the filling and it was amazing. But we used a prebought store pie crust and this time I want to make your pie crust. Is it okay to make the pie dough the day before and just keep it refrigerated?
I’m a dork I just saw that you said it’s good for 2 weeks. I need to get my eyes checked. Sorry.
My husband was craving an apple pie last night. We had three apples and he is Diabetic so a pie crust is out of the question. I went on line to find a recipe and found this one. I loved the simplicity of the apple filling and “NO SUGAR”. I didn’t have real maple syrup, but I did have sugar free maple syrup. Since I only had 3 apples, I split the measurements in half, put it in the microwave for 3 minutes. Removed it and added a handful of Original Oatmeal, 1/8 cup of water, mixed it and put it back in the microwave for another 3 minutes. When it was finished in the Microwave, I added another handful of Original Oatmeal, mixed it and then put it in my Blendtec Blender to pulse the apples into bite size pieces and then served it to my husband. It was a first time, so it is always a challenging test! LOL He LOVED IT!!! I did too. Leftovers are for tonight! (That’s if they are still in the fridge that long!)
I loved it when i read it and we baked today with my kids, its very tasty and awesome! My family loved it. Thanks for such a wonderful recipe, from, islamabad, Pakistan