Rich Pie Crust Recipe for Pi Day: A Tutorial
Today is ‘Pi Day’ or 3.14, a fun play on the date that a few of my (geek) Facebook readers pointed out last week. It just so happens that I’ve been meaning to share my fail-safe pie crust recipe, and so, propelled by a mathematical symbol and a calendar date, here it is!
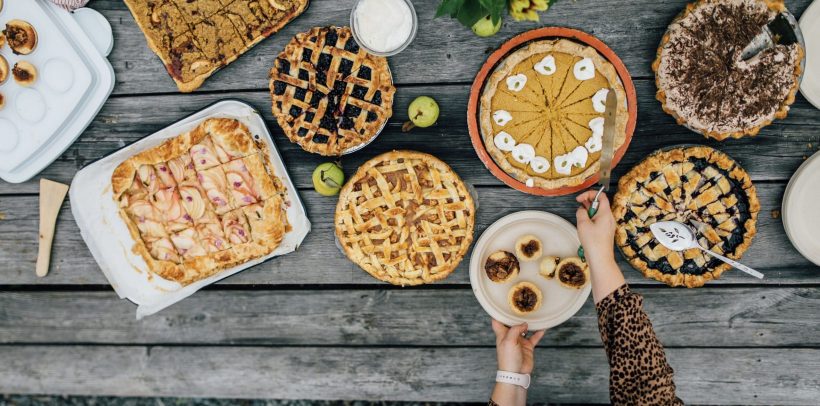
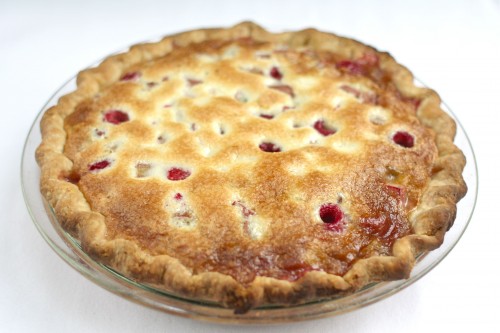
Everyone needs a reliable pie dough recipe in their repertoire, for where would we be without strawberry tarts, spinach quiche, or deep dish apple pie? Store-bought crusts just don’t meet the mark in flavor or texture, not to mention they contain plenty of trans fats and preservatives. Nope, a pie crust should be made from scratch, and that’s what we’re going to take on in this post.
You already know that I’ve given you the best muffin ever, perfect roast chicken, and the best zucchini bread ever, so I hope that you find similar success with my favorite pie dough recipe.
I’ve always come back to this pure butter pie crust for a few reasons:
- It holds up well. Whether it is supporting a jiggly quiche or runny fresh fruit pie, the bottom crust always cooks perfectly. Soggy crust is horrible; I like a nice browned bottom that holds together when a slice is transported from pan to plate. TIP: another key to a well-cooked underside is a Pyrex Pie Plate
 .
. - It freezes well. Raw crust can be frozen, in a well-wrapped ball, for up to five weeks. I also use this recipe for my meat pies and freeze the pies unbaked and whole. Pie crust in the freezer means an impromptu dessert is just around the corner!
- It is rich and flavorful. Thanks to the addition of pure butter and egg yolk, this crust leaves all others behind. Forget about greasy and pale shortening-based pie crusts, this one colors beautifully, tastes buttery, and crisps just right.
- It manages to remain flaky even after after manipulation. My boys love to get in on pie making, and goodness knows, they manhandle the dough to bits. Incredibly, it pulls through, and after a significant resting period, still comes out flaky.
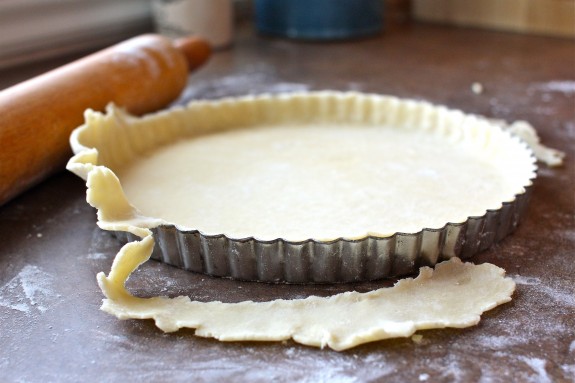
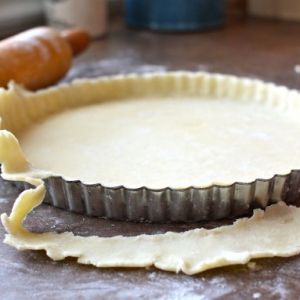
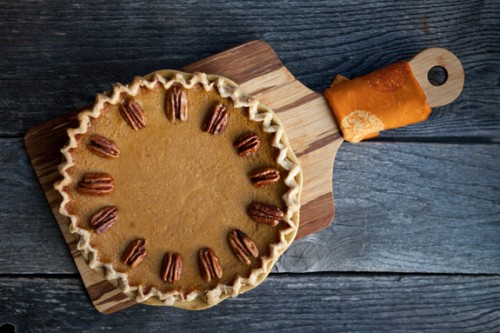
If this is your first attempt at homemade pie dough, or whether you’re a seasoned baker, I’m confident that the recipe and the steps below will guide you to a perfect pie crust, suitable for a wide variety of uses including tart shells, hand pies, free-form galettes and classic pie shells.

Tips to perfect pie crust
- Use butter. Just do it. It imparts a superior flavor, results in a flaky crust without greasiness, and is better for you than dough made with shortening.
- Use an acid. In this recipe, lemon juice is an acid that helps break down the gluten and results in a tender dough. You can also substitute white vinegar, but I prefer the bright flavor that the lemon imparts to the crust.
- Keep it cold. Butter and ice water should be chilled before commencing the recipe. When the butter gets too soft, the dough becomes sticky and difficult to work with. More flour may be needed, resulting in a tough dough.
- Rest the dough. This step happens after the dough is made, before it is rolled. A chilled dough will come together better, be easier to roll and produce a flakier crust.
Rich Pie Crust
Ingredients
- 3 cups all-purpose flour sifted
- 1 cup unsalted butter chilled, cut into 1/2-inch cubes
- 7-10 Tablespoons water ice-cold
- 2 egg yolks
- 2 Tablespoons lemon juice
- 1 tsp salt
Optional
- 3 Tablespoons sugar for sweet dough
Instructions
- Pour water into a measuring cup and add egg yolks and lemon juice. Beat with a fork. Add salt and sugar, if using. Drop in an ice cube to chill the mixture while you prep your flour.

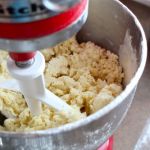
- Sift flour into the bowl of a stand mixer and add butter cubes. Use the paddle attachment and beat for about a minute until butter and flour are partially smeared together. It’s okay to have some lumps.
- With the mixer on ‘Stir’, slowly drizzle the egg and water liquid into the flour and butter. Mix for another 60 seconds until the dough starts to come together. Stop the mixer, remove paddle, and using your hands, gather the dough together into a ball.
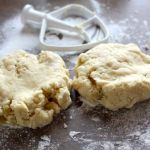
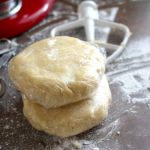
- Remove pie dough from mixing bowl and place on a lightly floured counter. Divide dough into two and flatten each piece slightly. Wrap each disc tightly in plastic wrap. Don’t worry if dough is slightly crumbly, it will come together in the chilling process.
- Chill dough for at least four hours and overnight if possible. Your pie dough is now ready to be used!

Notes
Nutrition
Links
What was the last pie made from scratch that you enjoyed?


I understand you prefer butter, but unfortunately.we have food allergy sufferers in our home who must stay dairy free. What would you recommend?
Try butter flavored crisco. Not as good, but works.
I tried this crust last night for my butternut Squash pie, and it’s really delicious with a pronounced butter flavor! It’s very different from the traditional pie crust I usually make , and love, it’s very flakey!!! something akin to puff pastry the egg and acid change the texture not in a bad way at all just different than the norm. Very tasty, and I think fruit pies will shine with this crust in particular…especially apple! My 2cent’s!
Thanks for sharing!
Eve
This recipe is so good! I discovered it just before Thanksgiving and have now made it for twice. I did double the recipe this second time with good results. I used my Kitchenaid mixer with the flour-shower-guard thing… yes, that’s the technical term 😉
Excited to try your recipe but do not have a stand mixer or food processor. Can a regular portable beater be used?
I’m not a big fan of lemon. Does the crust have a lemony taste or do you not even notice it?
No, it doesn’t taste like lemon.
Right, I’m about to make your crust. Making quiche & salad for dinner! Gonna be lekker man
I’ve always been afraid to make a homemade pie crust. But I’ve never come across a stand mixer recipe either. Your recipe and tutorial make me feel brave. Now I’m willing to try it.
So my crust was extremely crumbly and it took more fat to get it to form. I set it overnight and the top crust completely crumbled over my pie! 🙁 what happened?!
The recipe doesn’t call for nearly enough water. Ignore the amount stated and just keep gradually adding ice water till it comes together. If it gets a bit too moist, just flour the rolling surface, rolling pin, and your hands, and you’ll be good.
I would love to try this, but I don’t have a stand mixer (or food processor) – can I use a hand mixer
instead? Will it work?
How long do you bake the pie crust & at what temperature?
I made this for your Tourtière recipe a few days ago and really struggled with the dough. It barely held shape and was incredibly crumbly. I made it in the food processor. I’ve never had this much trouble with a crust before. Perhaps you could provide measurements in grams as well? I felt as though there wasn’t enough butter to hold everything together but perhaps the flour I use is more dense. The Tourtière was awesome, but making the dough definitely tainted my enjoyment of it.
No, the amount of water isn’t enough. Just ignore what’s stated and continue adding ice water slowly till it comes together.
I’ve used this recipe for a few years, and finally thought I’d leave a note for anyone confused: the amount of water this recipe calls for isn’t nearly enough. I just keep adding ice water until it comes together. I’m not sure how much I end up adding, but it’s probably at least triple what the recipe says if not more. The comments complaining about dry crumbly crust almost certainly are due to this.
This is the only pie crust recipe I ever use since discovering it years ago. Works perfectly every time, no adjustments. Just make sure not to over mix!